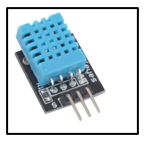
#include
<Adafruit_Sensor.h> //In order to
use DHT sensor we have to include this library first.
#define BLYNK_PRINT
Serial //Defining the object Serial.
//______________________Include
Libraries___________________________
#include
<DHT.h> //Including the DHT11
library.
#include
<ESP8266WiFi.h> //Including the
ESP8266 Wi-Fi library in order to use them.
#include
<BlynkSimpleEsp8266.h> //Library
for linking up Blynk with ESP8266.
#include
<Wire.h> //For using I2C
connection of BMP180 in order to connect it to the board.
#include
<Adafruit_BMP085.h> //Including
the library for BMP180.
Adafruit_BMP085
bmp; //Defining the object BMP180.
#define
I2C_SCL 12 //Connect SCL pin of BMP180
to GPIO12 (D6) of NodeMCU.
#define
I2C_SDA 13 //Connect SDA pin of BMP180
to GPIO13 (D7) of NodeMCU.
float
dst,bt,bp,ba; //Declare float variable.
float
h,t; //Declare float variable.
float
bpRef = 0; //Declare float variable.
float
hRef = 0; //Declare float variable.
int
BreathCount = 0; //Declare int variable.
int
IntervalCount = 0; //Declare int
variable.
char
dstmp[20],btmp[20],bprs[20],balt[20]; //Declare
char variable.
bool
bmp085_present = true; //Declare Boolean
variable.
bool
BreathCountEn = false; //Declare Boolean
variable.
bool
StartMeasureDone = false; //Declare
Boolean variable.
char
auth[] = "4rzRdKHPsOkrwM_560QzyzYvKrCRJLRi”.
//Authentication
Key will be there in the Blynk Application.
//_______________Mention
the SSID and Password_____________________
char
SSID[] = "MekLingg"; //SSID of
my Wi-Fi hotspot.
char
pass[] = "AzlinAnuar27"; //Password
of my Wi-Fi.
int
DHTErrorCnt = 0; //Declare int variable.
#define
DHTPIN 2 //Connect the DHT11 sensor's
data pin to GPIO2 (D4) of NodeMCU.
#define
DHTTYPE DHT11 //Mention the type of
sensor which is DHT11.
DHT
dht(DHTPIN, DHTTYPE); //Defining the pin
and the DHT type.
BlynkTimer
timer; //Defining the object timer.
WidgetLCD
lcd(V1); //Defining the object LCD (V1).
void
sendSensor()
{
//_______________Check
the working of BMP180 sensor__________________
if (!bmp.begin())
{
Serial.println("Could not
find a valid BMP085 sensor, check wiring!"); //while (1) {}
}
//_________Getting
the Humidity and temperature value from DHT11_________
h =
dht.readHumidity(); //Get Humidity %.
t = dht.readTemperature(); //dht.readTemperature (true) for Fahrenheit.
//_________________Check
the working of DHT11 sensor_____________
if (isnan(h) || isnan(t))
{
if(DHTErrorCnt++>10) //If fail to read from DHT11,Send Debug
message
{
Serial.println ("Failed to
read from DHT sensor!");
DHTErrorCnt = 0;
}
}
//_________Reading
the value of Pressure, Temperature, Altitude from the BMP180________
float bp = bmp.readPressure()/100; //Division by 100 makes it in millibars.
float ba = bmp.readAltitude();
float bt = bmp.readTemperature();
float dst =
bmp.readSealevelPressure()/100;
if(BreathCountEn == false) //Before start measuring, get the reference
pressure and Humidity 1st.
{
bpRef += bp;
hRef += h;
IntervalCount++;
}
if(IntervalCount>=4 &&
BreathCountEn == false) //Average the
reference by 4 and enable the Breath count.
{
bpRef /=4;
hRef /=4;
BreathCountEn = true;
lcd.clear();
lcd.print(5, 0, "E-Mask"); //Use: (position X:0-15, position Y:0-1,
"Message
you want to print")
lcd.print(5, 1, "Ready
!");
}
if(BreathCountEn && bp >
bpRef)BreathCount+=1; //If pressure
reading > reference pressure, increase breath count by 1.
if((BreathCount > 0 || h >
hRef)&& StartMeasureDone == false)
//If Humidity reading > reference Humidity, start measuring.
{
lcd.clear();
lcd.print(2, 0, "Measuring..."); //Use: (position X:0-15, position Y:0-1,
"Message you want to print")
lcd.print(2, 1, "Breath
Count");
StartMeasureDone = true;
}
//_____Printing the values of the above read
value on to the Virtual Pins in the Blynk App____
Blynk.virtualWrite(V5 , h); //Send Humidity to Blynk.
Blynk.virtualWrite(V6 , t); //Send Temperature to Blynk.
Blynk.virtualWrite(V10, bp); //Send Pressure to Blynk.
Blynk.virtualWrite(V12, bt); //Send Temperature to Blynk.
Blynk.virtualWrite(V13, BreathCount); //Send Breath Count to Blynk.
//______Printing
the values of the above read value on Arduino Serial Terminal_____
Serial.print(bp);
Serial.println("mbar");
Serial.print(bt);
Serial.println("degrees C");
Serial.print(h);
Serial.println("% Humi");
Serial.print(t);
Serial.println("degrees C");
Serial.print(BreathCount);
Serial.println("Breath Count");
Serial.print(bpRef);
Serial.println("bp Ref");
}
void
BreathRateInOneMin()
{
Serial.print(BreathCount);
Serial.println("Count");
timer.setTimeout(60000, BreathRateInOneMin);
if(BreathCount >=12 &&
BreathCount<=20) //Breath count is
considered Normal within 12 to 20 beats per minute.
{
//Blynk.notify("Normal Breath");
lcd.clear();
lcd.print(2, 0, "Normal Breath"); //Use: (position X:0-15, position Y:0-1,
"Message you want to print")
lcd.print(9, 1, BreathCount);
}
else if(BreathCount> 20 || BreathCount <
12) //Else breath count is considered
Abnormal if >20 or <12 beats per minute.
{
if(BreathCount == 0) //Else if = 0, No Breath activity.
{
//Blynk.notify("No Breath Activity!");
lcd.clear();
lcd.print(0, 0, "No Activity"); //Use: (position X:0-15, position Y:0-1,
"Message
you want to print")
lcd.print(9, 1, BreathCount);
}
else
{
//Blynk.notify("Abnormal
Breath!");
lcd.clear();
lcd.print(0, 0, "Abnormal
Breath!"); //Use: (position X:0-15,
position Y:0-1, "Message you want to print")
lcd.print(9, 1, BreathCount);
Blynk.notify("Abnormal Breath
!!!");
}
}
BreathCount = 0;
}
void
setup()
{
Serial.begin(9600); //Initializing the Serial Monitor with a Baud
Rate of 9600.
Blynk.begin(auth, ssid, pass); //Start Blynk Application.
dht.begin(); //Initializing the DHT sensor.
Wire.begin(I2C_SDA, I2C_SCL); //Initializing the I2C connection.
delay(10); //Delay 10ms to complete.
lcd.clear(); //Use it to clear the LCD Widget.
lcd.print(3, 0,
"Diagnostic"); //Use:
(position X:0-15, position Y:0-1, "Message you want to print")
lcd.print(5, 1, "Test!");
//Please use timed events when LCD printing in void loop to avoid
sending too many commands.
//It
will cause a FLOOD Error, and connection will be dropped.
timer.setInterval(1000L, sendSensor); //Interval 1 second to read sensors.
timer.setTimeout(60000,
BreathRateInOneMin); //Interval 1 minute
to check Breath count.
}
void
loop()
{
Blynk.run();
//Continue run Blynk Application.
timer.run();
//Continue run timer.
}
//Source code above is written by Norazlin
binti Anuar for FYP2 project Semester Jan 2021.
//Program in Arduino IDE for “ E-mask for COVID-19:
Person Under Investigation (PUI)”