Friday, March 12, 2021

_WEEK 6_ (FYP2)


Activity: Combine Source Code for the E-mask. 


    Overall during this week, coding for Wi-Fi ESP8266 module is obtained and the adjustments is done appropriately to the project. Aside from that, the Blynk application necessitates code. The code is based on past work and assistance from seniors. The Blynk application has been successfully installed and is communicating with the controller. Moreover, the Blynk application is configured with the relevant buttons in accordance with the microcontroller. When I found all of the coding for this project, I attempted to integrate it all into one code. Several sections of the code are derived from Google and prior UniKL BMI Projects. The Blynk application is downloaded, and some study is conducted to better understand how it works. In a nutshell, the coding has been tested and works as required. The next step is to build a circuit on the breadboard to ensure that the project works properly.


The following is the source code that has been successfully compiled:

#include <Adafruit_Sensor.h>  //In order to use DHT sensor we have to include this library first.

#define BLYNK_PRINT Serial  //Defining the object Serial. 

//______________________Include Libraries___________________________

#include <DHT.h>  //Including the DHT11 library.

#include <ESP8266WiFi.h>  //Including the ESP8266 Wi-Fi library in order to use them.

#include <BlynkSimpleEsp8266.h>  //Library for linking up Blynk with ESP8266.

#include <Wire.h>  //For using I2C connection of BMP180 in order to connect it to the board.

#include <Adafruit_BMP085.h>  //Including the library for BMP180.

Adafruit_BMP085 bmp;  //Defining the object BMP180.

#define I2C_SCL 12  //Connect SCL pin of BMP180 to GPIO12 (D6) of NodeMCU.

#define I2C_SDA 13  //Connect SDA pin of BMP180 to GPIO13 (D7) of NodeMCU.

float dst,bt,bp,ba;  //Declare float variable.

float h,t;  //Declare float variable.

float bpRef = 0;  //Declare float variable.

float hRef  = 0;  //Declare float variable.

int BreathCount = 0;  //Declare int variable.

int IntervalCount = 0;  //Declare int variable.

char dstmp[20],btmp[20],bprs[20],balt[20];  //Declare char variable.

bool bmp085_present = true;  //Declare Boolean variable.

bool BreathCountEn = false;  //Declare Boolean variable.

bool StartMeasureDone = false;  //Declare Boolean variable. 

char auth[] = "4rzRdKHPsOkrwM_560QzyzYvKrCRJLRi”.  

//Authentication Key will be there in the Blynk Application.

//_______________Mention the SSID and Password_____________________

char SSID[] = "MekLingg";  //SSID of my Wi-Fi hotspot.

char pass[] = "AzlinAnuar27";  //Password of my Wi-Fi.

int DHTErrorCnt = 0;  //Declare int variable.

#define DHTPIN 2  //Connect the DHT11 sensor's data pin to GPIO2 (D4) of NodeMCU.   

#define DHTTYPE DHT11  //Mention the type of sensor  which is DHT11.

DHT dht(DHTPIN, DHTTYPE);  //Defining the pin and the DHT type.

BlynkTimer timer;  //Defining the object timer.

WidgetLCD lcd(V1);  //Defining the object LCD (V1).

void sendSensor()

{

//_______________Check the working of BMP180 sensor__________________        

 if (!bmp.begin())

          {

              Serial.println("Could not find a valid BMP085 sensor, check wiring!");  //while (1) {}

          }

//_________Getting the Humidity and temperature value from DHT11_________

h = dht.readHumidity();  //Get Humidity %.    

          t = dht.readTemperature();  //dht.readTemperature (true) for Fahrenheit.

//_________________Check the working of DHT11 sensor_____________

 if (isnan(h) || isnan(t))

          {

              if(DHTErrorCnt++>10)  //If fail to read from DHT11,Send Debug message

              {

               Serial.println ("Failed to read from DHT sensor!");

                DHTErrorCnt = 0;

              }

          }

//_________Reading the value of Pressure, Temperature, Altitude from the BMP180________

          float bp =  bmp.readPressure()/100;  //Division by 100 makes it in millibars.

          float ba =  bmp.readAltitude();

          float bt =  bmp.readTemperature();

          float dst = bmp.readSealevelPressure()/100;

      if(BreathCountEn == false)  //Before start measuring, get the reference pressure and Humidity 1st.

          {

            bpRef += bp;

            hRef  += h;

            IntervalCount++;

          }

       if(IntervalCount>=4 && BreathCountEn == false)  //Average the reference by 4 and enable the Breath count.

          {

            bpRef /=4;

            hRef  /=4;

            BreathCountEn = true;

            lcd.clear();

            lcd.print(5, 0, "E-Mask");  //Use: (position X:0-15, position Y:0-1,

"Message you want to print")

            lcd.print(5, 1, "Ready !"); 

          }

          if(BreathCountEn && bp > bpRef)BreathCount+=1;  //If pressure reading > reference pressure, increase breath count by 1.

          if((BreathCount > 0 || h > hRef)&& StartMeasureDone == false)  //If Humidity reading > reference Humidity, start measuring.

          {

             lcd.clear();

         lcd.print(2, 0, "Measuring...");  //Use: (position X:0-15, position Y:0-1, "Message you want to print")

             lcd.print(2, 1, "Breath Count");

             StartMeasureDone = true;

          }

 //_____Printing the values of the above read value on to the Virtual Pins in the Blynk App____

          Blynk.virtualWrite(V5 , h);  //Send Humidity to Blynk.

          Blynk.virtualWrite(V6 , t);  //Send Temperature to Blynk.

          Blynk.virtualWrite(V10, bp);  //Send Pressure to Blynk.

          Blynk.virtualWrite(V12, bt);  //Send Temperature to Blynk.

          Blynk.virtualWrite(V13, BreathCount);  //Send Breath Count to Blynk.

//______Printing the values of the above read value on Arduino Serial Terminal_____   

          Serial.print(bp); Serial.println("mbar");  

          Serial.print(bt); Serial.println("degrees C");

          Serial.print(h); Serial.println("% Humi");

          Serial.print(t); Serial.println("degrees C");

          Serial.print(BreathCount); Serial.println("Breath Count");

          Serial.print(bpRef); Serial.println("bp Ref"); 

}

void BreathRateInOneMin()

{

 Serial.print(BreathCount); Serial.println("Count");

 timer.setTimeout(60000, BreathRateInOneMin);

 if(BreathCount >=12 && BreathCount<=20)  //Breath count is considered Normal within 12 to 20 beats per minute.

 {

  //Blynk.notify("Normal Breath");

  lcd.clear();

  lcd.print(2, 0, "Normal Breath");  //Use: (position X:0-15, position Y:0-1, "Message you want to print")

  lcd.print(9, 1, BreathCount);

 }

 else if(BreathCount> 20 || BreathCount < 12)  //Else breath count is considered Abnormal if >20 or <12 beats per minute.

 {

  if(BreathCount == 0)  //Else if = 0, No Breath activity.

  {

//Blynk.notify("No Breath Activity!");

  lcd.clear();

  lcd.print(0, 0, "No Activity");  //Use: (position X:0-15, position Y:0-1,

"Message you want to print")

  lcd.print(9, 1, BreathCount);

  }

  else

  {

    //Blynk.notify("Abnormal Breath!");

   lcd.clear();

   lcd.print(0, 0, "Abnormal Breath!");  //Use: (position X:0-15, position Y:0-1, "Message you want to print")

   lcd.print(9, 1, BreathCount);

   Blynk.notify("Abnormal Breath !!!");

  }

 }

 BreathCount = 0;

}

void setup()

{

         Serial.begin(9600);  //Initializing the Serial Monitor with a Baud Rate of 9600.

          Blynk.begin(auth, ssid, pass);  //Start Blynk Application.

          dht.begin();  //Initializing the DHT sensor.

          Wire.begin(I2C_SDA, I2C_SCL);  //Initializing the I2C connection. 

          delay(10);  //Delay 10ms to complete.

          lcd.clear();  //Use it to clear the LCD Widget.

          lcd.print(3, 0, "Diagnostic");  //Use: (position X:0-15, position Y:0-1, "Message you want to print")

        lcd.print(5, 1, "Test!");  //Please use timed events when LCD printing in void loop to avoid sending too many commands.

//It will cause a FLOOD Error, and connection will be dropped.

timer.setInterval(1000L, sendSensor);  //Interval 1 second to read sensors.

timer.setTimeout(60000, BreathRateInOneMin);  //Interval 1 minute to check Breath count.

}

void loop()

{

  Blynk.run();  //Continue run Blynk Application.

  timer.run();  //Continue run timer.

} 

//Source code above is written by Norazlin binti Anuar for FYP2 project Semester Jan 2021.

//Program in Arduino IDE for “ E-mask for COVID-19: Person Under Investigation (PUI)”

Wednesday, March 3, 2021

_WEEK 5_ (FYP2)


Activity: Hardware Selection & Software Implementation.


This week, I will go through the main hardware, software and application that will be utilized in the development of the E-mask, which are mentioned below.

  • BMP180 Barometric Sensor


    BMP180 is a sensor from the BMP180 series. The sensor is all made to measure atmospheric pressure, generally defined as barometric pressure. The BMP180 is a high-precision sensor intended for consumer use Barometric pressure is the weight of air applied to everything. The air has weight, and pressure is sensed anywhere there is air. The BMP180 sensor detects the pressure and produces the data in a digital format. In this project, the BMP180 serves as an input, sensing the air pressure exhaled by the PUI and calculating the PUI's breath count in one minute.

  • DHT11 Temperature and Humidity Sensor


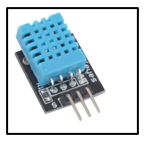
    The DHT11 is a temperature and humidity sensor that is frequently used. The sensor includes a temperature NTC and an 8-bit microcontroller for serial data output of temperature and humidity measurements. Since the sensor has been completely calibrated, it is simple to connect to other microcontrollers. The sensor has a temperature range of 0°C to 50°C and a humidity range of 20% to 90%, with a precision of 2°C and 5%, respectively. The DHT11 serves as an input in this project, detecting the air humidity exhaled by the PUI and calculating it as an output.


  • NodeMCU (ESP8266)


    NodeMCU is a LUA-based open-source firmware and development board designed for Internet of Things (IoT) applications. It features firmware that operates on the ESP8266 Wi-Fi SoC from Espressif Systems, and hardware based on the ESP-12 module. The ESP-12E module on the NodeMCU ESP8266 development board contains an ESP8266 chip with a Tensilica Xtensa 32-bit LX106 RISC microprocessor. The NodeMCU Development Board are often easily programmed with Arduino IDE since it is easy to use. It will take no more than 5-10 minutes to programme NodeMCU using the Arduino IDE. In this project, the ESP8266 operates as a microcontroller that processes data from the input and sends it to the output for execution.


  • Arduino IDE


    Arduino Integrated Development Environment (IDE) is the software used to program the ESP8266 Wi-Fi module and make the hardware of the module work accordingly on the basis of the coding programmed by this software through the NodeMCU. Furthermore, using the Arduino IDE, the microcontroller can also be programmed to connect with any available Wi-Fi network. In this project, the hardware has been programmed and the operation will be carried out by the BMP180, DHT11 sensors and Blynk application after getting the information from the microcontroller.


  • Blynk Application

    Blynk is a mobile phone’s application that includes a hardware-agnostic Internet of Things (IoT) platform with white-label mobile application, private clouds, device management, data analytics, and machine learning. Moreover, Blynk is an application that allows to quickly build interfaces for controlling and monitoring hardware projects from iOS and Android devices. After that, through this platform a project dashboard and arrange buttons, sliders, graph, and another widget onto the screen can be created. This software will help the PUI to monitor their breathing activity on their own through the application. In the application, PUI can directly see their breath count in the form of a bar graph, air pressure in the form of a line graph and other parameters such as humidity and temperature in labeled value. So that PUI can keep the DHO updated about their latest health condition regularly.

Thursday, February 25, 2021

_WEEK 4_ (FYP2)


Activity: Survey the Shop & Purchase the Components.


    Due to the current situation of the COVID-19 outbreaks, students are not encouraged to go out to buy components physically. Currently, by this week, I have already specified the components that needed to be purchased and started making an online survey to the most suitable and affordable store to acquire the necessary components for the project. Among the convenience of buying components online are saving our time, a wide variety/range of products are available, I can compare various models/brands and lastly can see product ratings and also reviews from other customers.  

Here is a list of stores I have surveyed in Shopee: 
  • Autobotic 

  • Felanino.shop.my

  • iConTech Component


List the components that need to buy: 
  • NodeMCU ESP8266 Wi-Fi Module
  • Sensor BMP180
  • Sensor DHT11
  • AA Batteries
  • AA Battery Holder
  • Core Wires
  • Core Wires
  • Resistor 27Kꭥ ± 5%
  • Chemical Gas / Dusk Mask
  • Soldering Set
  • Soldering Lead
  • Soldering Paste 
  • White Breadboard 16.5cm X 5.5cm

    All of the above-mentioned components are available in these three stores. I need to compare pricing across these three stores in order to locate the best deal. Everything went smoothly and all components were successfully purchased.

Wednesday, February 17, 2021

_WEEK 3_ (FYP2)


Activity: Virtual discussion with Supervisor.


    This is the 3rd week of FYP2 for this semester. Given the current situation that does not allow any physical activity to be held, so any discussion with supervisors related to the progress project will be held online, either by holding an online meeting via Microsoft Teams or WhatsApp's. 

    This week I am detailing the goals, time and planning as well as detailed project management so that this project can run smoothly throughout this semester. The most critical part should be done first to avoid some problems that can make this project delayed. If the problem occurs, it will prevent the entire project from being completed on time. Project planning is very important as it will help to complete the project on time.


    After researching the different between Microcontroller Arduino UNO and NodeMCU, the Arduino Uno was the controller that I have chosen last semester to be used in my project for this semester. However, after the study for both controller, I identify that NodeMCU is more practical to be used because it is having inbuilt WIFI, which means I can easily connect the NodeMCU to internet without much effort compare to connecting Arduino UNO to internet, and the best thing is NodeMCU is Arduino compatible where I also can do all possible stuff that can be done with Arduino UNO. Besides that, NodeMCU also can be programmed in 'C' language using Arduino IDE directly. If I still wanna use Arduino Uno as the controller for my project, then I need to add Bluetooth module to transfer the data to the PUI smartphone. However, if I use the NodeMCU, I does not need any Bluetooth module anymore.

Friday, February 12, 2021

_WEEK 2_ (FYP2)


Activity: Introductory FYP2 Briefing & Progress Meeting with Supervisor.


    Today is the 2nd week for FYP2. During this week, introductory briefing was conducted via Microsoft Teams. Attendance of all FYP2 students is compulsory. They need to scan the QR code that has been provided and their attendance will be taken through Microsoft Team Attendance. The briefing was conducted by Sir Mohamad Shaiful Osman lecturer from Electrical Technology department.


Date: 10 Feb 2021

Time: 3:00 pm – 5:00 pm

Via: Microsoft Teams 


In this briefing, the FYP committee have briefed us about: 

  • Code of subject for FYP2 (BPB49906) must be correct.
  • Evaluation should be done for FYP2 which is a progress report (log book / blog), presentation, and prototype project.
  • FYP activities throughout this semester.


    The brief was intended to explain details about the calendar, the project developments, the thesis report and also regarding the progress report/log book. The student need to write report according to the content needed. Apart from that, Sir Mohamad Shaiful Osman also briefs us regarding the amount of claim that each student could do. He explained the claim procedures in detail.

    Apart from that, this week also the meeting that was postponed between me and my supervisor last week was successfully held. During the meeting, we discussed all the comments and suggestions on my project that the assessors had given to me. In addition, for the progress of my project, I am still waiting for some components that have not yet arrived. Upon arrival, I will begin to test for those components to assess the level of suitability of the components I will use for my project. 


Thursday, February 4, 2021

_WEEK 1_ (FYP2)


Activity: 1st Week for FYP2 and Continue Progress from FYP1.


    This week is the first week for my Final Year Project 2 (FYP2). So now, I need to continue the progress of the project I proposed from FYP1 that has been left last semester. During the semester break, I did some research and analysis for my project to find answers and developments from the ideas and comments taken from both of my assessors during my FYP1 exhibition that has been held last semester.

    Actually on this week I supposed to have a meeting with my supervisor to discuss about the progress of my project and the comments given by the assessors during the exhibition last semester. Unfortunately, on the day that the meeting was held, I was unable to attend due to unavoidable reasons. Therefore, my supervisor and I have agreed to hold the meeting on next week. Now, my project "E-Mask for COVID-19" is now officially begins.

Tuesday, November 17, 2020

_WEEK 17_ (FYP1)


Activity: Final Week for FYP1 Proposal Report and Progress Report Submission to FYP Supervisor


Basically nothing much throughout this week. The proposal report and progress report was submitted to Dr. Hasmiza on time. After the final submission, I continued on how to develop my project. From all the research that I have already made, I was trying to create the project. This blog will be continued on the next semester during Final Year Project (FYP2) and it will be totally about developing my project.

In nutshell, I am grateful to Allah S.W.T for the strength to complete my FYP1 successfully. And a lot of thanks to Dr. Hasmiza which helped me a lot and guided me to complete the whole task for FYP1 during this semester. I really hope this subject will help me to improve my knowledges about this project and also improve my current CGPA for this semester. Special THANKS to my beloved supervisor for helping me throughout the process. May Allah S.W.T bless all the knowledge and guidance given by Dr. Hasmiza to me.


_WEEK 19_ (FYP2)

  Activity: Hardcover print & Complete Thesis Submission.      Generally, this was the final week for the progress report of my Final Ye...